How to Apply Venetian Plaster Over Wallpaper
A Beautiful Way to Replace Wallpaper
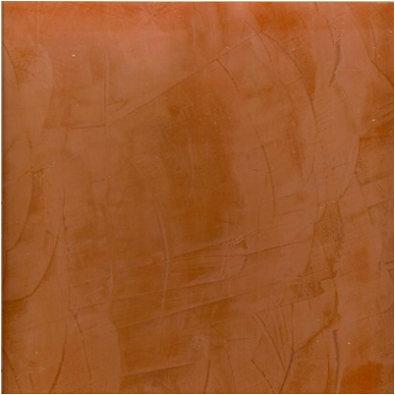 Venetian Plaster Over Wallpaper. Source: Corbin Henry
Venetian Plaster creates a beautiful marble-like finish on interior walls. The manufacturers instructions don't include covering wallpaper. This article will tell you how to professionally apply Venetian Plaster over wallpaper. There are multiple methods of applying Venetian Plaster, and each method has it's own unique effect.
The Project
I once was asked to do something to the bathroom walls of a beautiful older home that was recently put up for sale. The bathroom had outdated wallpaper, and the realtor wanted to update the look with a Venetian Plaster. Of course I told her I could do it, but I had never heard of this particular application before, so I had to do some quick research.
At that time oil based primer was still commonly used in California, and I knew that it was used over wallpaper in order to repaint it, so it made sense that this same method would work for Venetian Plaster. The only issue was covering the texture of the wallpaper with the Venetian Plaster. I concluded that it may take on extra coat to make it perfect.
At that time oil based primer was still commonly used in California, and I knew that it was used over wallpaper in order to repaint it, so it made sense that this same method would work for Venetian Plaster. The only issue was covering the texture of the wallpaper with the Venetian Plaster. I concluded that it may take on extra coat to make it perfect.
Before You Start
If this is your first time using Venetian Plaster you may need to practice. You may want to practice on a sample board of some sort, both drywall and foam boards are available, and inexpensive. You may find 2'x2' drywall boards at home improvement store like Home Depot and Lowe's, and foam boards at many craft store such as Michael's.
Recommended Tools
- Cloth drops (enough to cover the floors under the walls you plan to paint)
- Sponge sanding block (fine, not course)
- Blue tape (1.5" recommended)
- A utility knife
- A Texturing & Polishing Trowel
- A putty knife (or multi-tool with a blade edge)
- A ladder (high enough for you to reach the ceiling edge)
- A 4-6" spatula (plastic recommended)
- A Venetian Plaster Steel Spatula Kit (found in stores carrying Venetian Plaster)
- A mud pan/tray
- Clean rags
- Mineral Spirits (for cleaning oil-based primer from tools).
The Process
1. Lay tarps down in front of the wall being worked on. Make sure there are no gaps between the tarp and the wall. Tape the baseboards. I like to use 1.5" blue tape because it covers more and comes off easily. If the wall connects to another wall or ceiling that is not being plastered, tape those surfaces as well. Make sure you press the tape firmly to prevent bleed-through.
2. Feel for any loose wallpaper. Usually they will be at the seams and corners. Rip, don't cut, the wallpaper off the wall. I suggest using a metal putty knife to pry under stubborn wallpaper. You are NOT going to remove all the wallpaper, just the parts that come off easily.
3. Use an oil-based primer/sealer on the entire surface. Don't worry that the wallpaper has left rough textured areas, the Venetian Plaster will cover that. Let the oil-based primer/sealer dry, usually this will take 1-2 hours. I suggest cleaning your brush and roller with mineral spirits within an hour or two of finishing.
4. Keep a wet rag near your work area to clean up any drips. Pour Venetian Plaster into mud pan/tray. Use about one third of a gallon at a time, that way it won't dry before it's applied.
5. Use the small blades in your Venetian Plaster steel spatula kit to apply plaster in narrow areas like between door jams and corners. Begin by loading a small amount of Venetian Plaster on the 4-6" plastic Spatula. I usually just pull the spatula across the top of the Venetian Plaster in the mud pan/tray to the edge of the tray. Then I scrape the edge of the spatula against the edge of the tray as I pull the spatula up and out of the tray. This keeps the edge of the spatula clean, making it easier to get into the corners.
6. Start in the upper corner of your project area. Hold the spatula at a 15-30 degree angle and thinly spread the Venetian Plaster from the corner out onto the wall, in random directions. Use both short and long stokes to give it the variation of color and texture that we look for in Venetian Plaster. If you find the plaster is too thick, just lightly scrape some off the wall. You will likely do more than one coat, so having a thin first coat is ok. You may have to wait 4 hours to dry between coats. The simple method here is spread on, scrape off. Try to scrape off by scraping into/over the wet plaster. IE; spread it on in a down stroke, scrape it off in an upward stroke. Repeat in random directions until entire surface is covered. You may see some wallpaper texture after the first coat, but you will want that covered by the final coat. It will take 2-3 coats, usually just 2 coats will do.
7. After the final coat, wait a minimum of 4 hours and then sand the surface. The manufacturer recommends using 400-600 grit sand paper, but I find that a simple sponge sanding block works quite well. Plus it's easier and less expensive. The surface will not be perfectly flat. You will want it to have slight hills and valleys that will add to the depth and beauty of the finish.
8. With several clean wet rags, wash the dust off the entire surface and let it dry. It will have a dull finish when dry. Turn the rage frequently while wiping.
9. Use your Texturing & Polishing Trowel to burnish the surface. This tool has 2 methods of use. One is to use the flat surface to rub in circular patterns, and the second method is to scrape the surface with the edge of the blade. Burnishing will bring out the contrasting colors and make it shine to a satin finish.
10. Use the Venetian Plaster Steel Spatulas in your kit to give the finish a higher gloss than the burnishing tool. Scraping the edge of the blade across the wall is like using a high grit sand paper, but with better results.
11. The final step is to remove the tape. I recommend using a utility knife and cutting along the tapes edge before removing the tape.
Congratulations! You have a beautiful new room!
